


How Canvas Apps Use Clipboard to Copy Controls
April 29, 2023
5 min
If you’ve ever tried to edit a SharePoint list customized form outside of Power Apps Studio (export the package, tweak the YAML, import it back), you’ll have noticed every “obvious” path is quietly broken. No CLI command uploads it. The Import Package “Update” flow doesn’t even list it. Studio’s new UI no longer has File → Open. The canvas-authoring MCP server silently strips the control that makes a customized form a customized form.
And yes, Microsoft actually documents an external-tools workflow for this at Create canvas apps with external tools. It describes exactly the kind of download > unpack > edit-YAML > repack > reopen loop you’d want. It works fine for standalone Canvas apps: you can Save a copy as a .msapp, edit, then File > Open the edited .msapp back into Studio and publish. For SharePoint list customized forms it does not work. The customized-form variant of Studio hides the File > Open entry point, the Import Package “Update” flow excludes customized forms from its dropdown, and there is no pac canvas upload verb. Following the Microsoft doc on a customized form leaves you with an edited .msapp and no way to get it back to the list. Hence the convoluted recipe below.
Why do this at all? Because once the form’s source is in plain YAML files on disk, you can throw AI tools at it. GitHub Copilot, Claude Code, Cursor: any of them can read the unpacked .pa.yaml files, understand the control tree, and make edits across the whole form in seconds. Renaming every DataCardValue to follow a convention, flipping Required flags based on a spec, adding a whole new card with the right formulas, restyling every label: the kinds of edits that would take half an hour of clicking in Studio take a single prompt. Studio is great for small in-place tweaks. For anything you’d call “refactoring”, AI on the YAML is dramatically faster, and this round-trip is what makes that possible.
The real-world reason I figured this out: I’m migrating over a hundred legacy InfoPath forms to SharePoint Online list customized forms built on Canvas. InfoPath Forms Services in SharePoint Online is retiring on July 14, 2026, and Microsoft stops letting tenants publish new or updated InfoPath forms even earlier, on May 18, 2026. After that, your only way forward for list-driven data entry is a Canvas-based customized form. A hundred-plus forms times “click through Studio one card at a time” is not a realistic plan; a hundred-plus forms times “AI edits the YAML, script repacks and uploads” is. That’s what motivated this whole workflow.
After burning a form and a lot of hours, I found exactly one path that actually round-trips edits back to the live list. This post documents that path and nothing else.
Heads-up: you need to be an Environment Admin (Power Platform Admin on the target environment) to run this workflow. Step 4 deletes the existing customized-form app through the Power Platform Admin Center, which regular makers cannot do. If you don’t have admin rights on the environment, find someone who does before you start.
The first three steps below are automated by a small set of PowerShell scripts and Windows .bat wrappers. Clone the repo and install the Power Platform CLI once:
The rest of the article assumes you have the repo checked out and are running the .bat files from there. Once cloned, the form-edit\ subfolder looks like this:
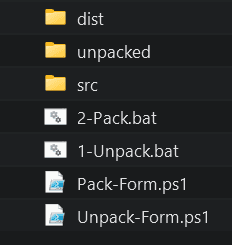
You’ll double-click the two .bat files; the rest is plumbing the scripts take care of.
Customized forms are hidden from the make.powerapps.com Apps list by design. The only place you can download their package is the Versions page, at this URL shape:
https://make.powerapps.com/environments/<env-id>/apps/<app-id>/versions
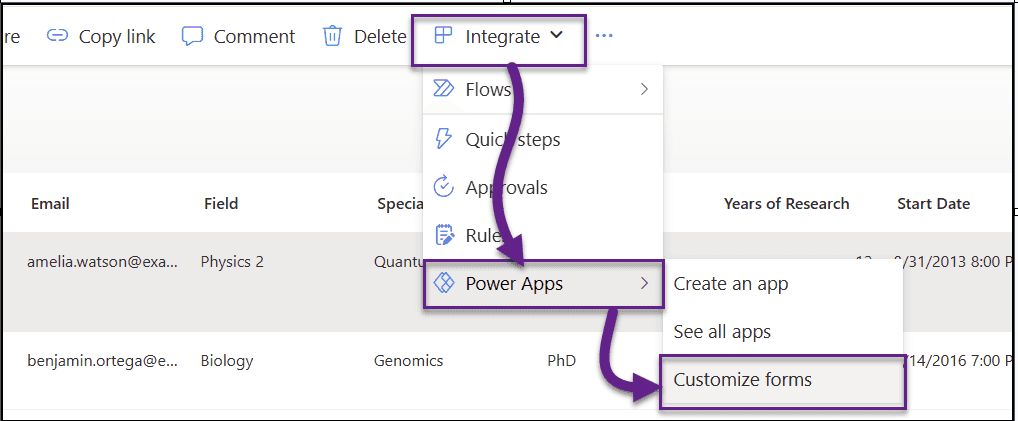
You don’t have to build that URL by hand. From your SharePoint list toolbar, click Integrate > Power Apps > Customize forms to open the form in Power Apps Studio.
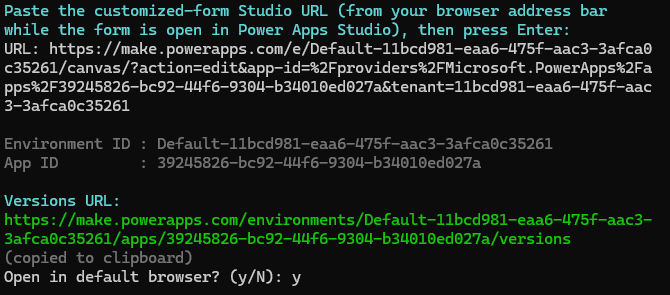
Copy the Studio URL from your browser’s address bar, then double-click Get-VersionsUrl.bat in the repo root. Paste the URL at the prompt and press Enter. The script prints the Versions URL, copies it to your clipboard, and offers to open it in your default browser.
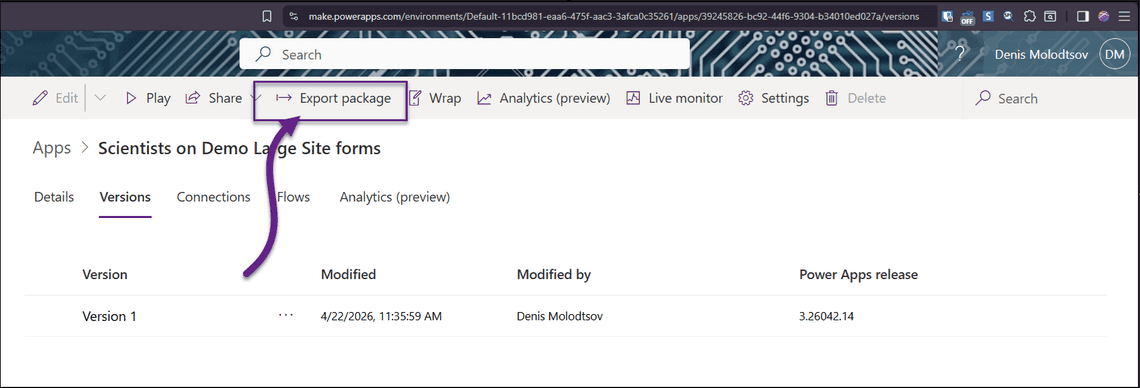
On the Versions page, pick the live version and click Export package to download the .zip.
Drop the .zip you just downloaded into form-edit\src\, then double-click form-edit\1-Unpack.bat.
Under the hood the script extracts the outer .zip, finds the embedded .msapp (the real Canvas app source), and runs pac canvas unpack on it. The output lands in form-edit\unpacked\ as a tree of .pa.yaml / .fx.yaml files. The most useful one for form edits is usually Src\FormScreen1.fx.yaml.
Edit the YAML in VS Code. Ask Copilot or Claude Code to rename controls, flip Required flags, restyle cards, add new DataCards, rewrite Power Fx formulas. Anything you can describe in a prompt is now a few seconds away.
.zipWhen you’re done editing, double-click form-edit\2-Pack.bat. The repacked .zip lands in form-edit\dist\ with a timestamped filename.
The reason you need this script instead of just zipping the folder yourself: Power Apps’ importer is extremely picky about zip format. Compress-Archive, tar, and most GUI zippers produce archives that the importer silently rejects. The only recipe that works is [System.IO.Compression.ZipFile]::CreateFromDirectory(..., CompressionLevel::Optimal, includeBaseDirectory=false). The script uses exactly that call; you don’t have to think about it.
This is the non-obvious step. You cannot Update the existing customized form (the Update dropdown doesn’t list it, see below), and you can’t “Create as new” with the same name while it still exists. So delete it first:
Power Platform Admin Center → Environments → your env → Resources → Canvas apps → find the form by name → Delete.
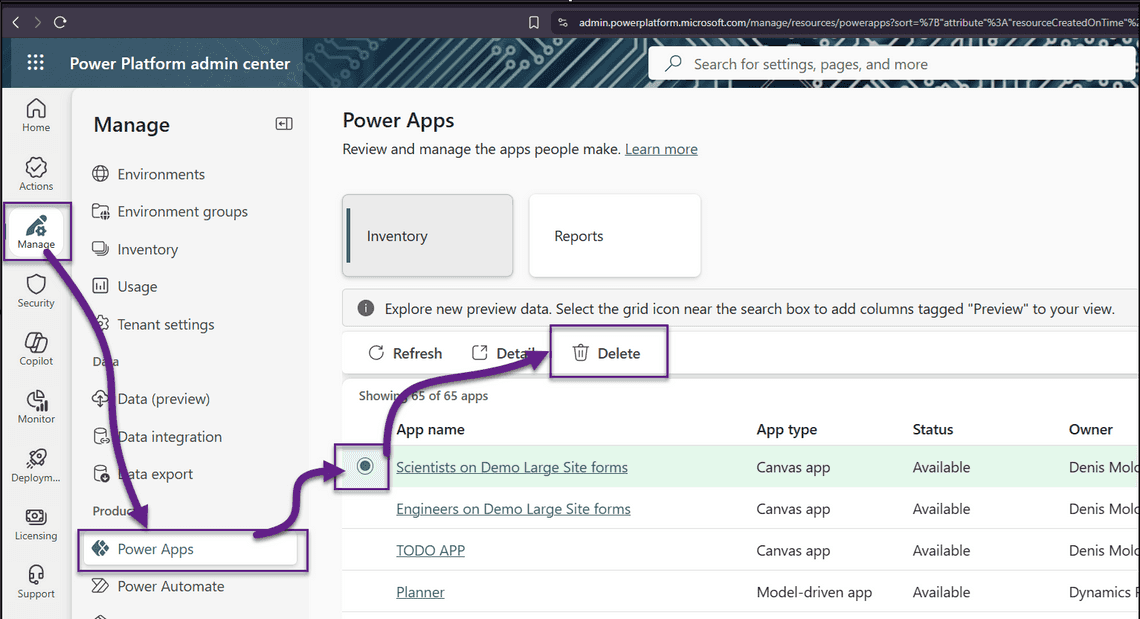
This step is why you need to be an Environment Admin: the Canvas apps grid in the admin center (and the Delete button on it) is gated on environment-admin rights. Regular makers cannot get here.
Warn anyone else editing the form before you do this. It’s destructive. Keep the Versions URL and the live version noted so you can restore from the Admin Center’s recycle bin if the import fails.
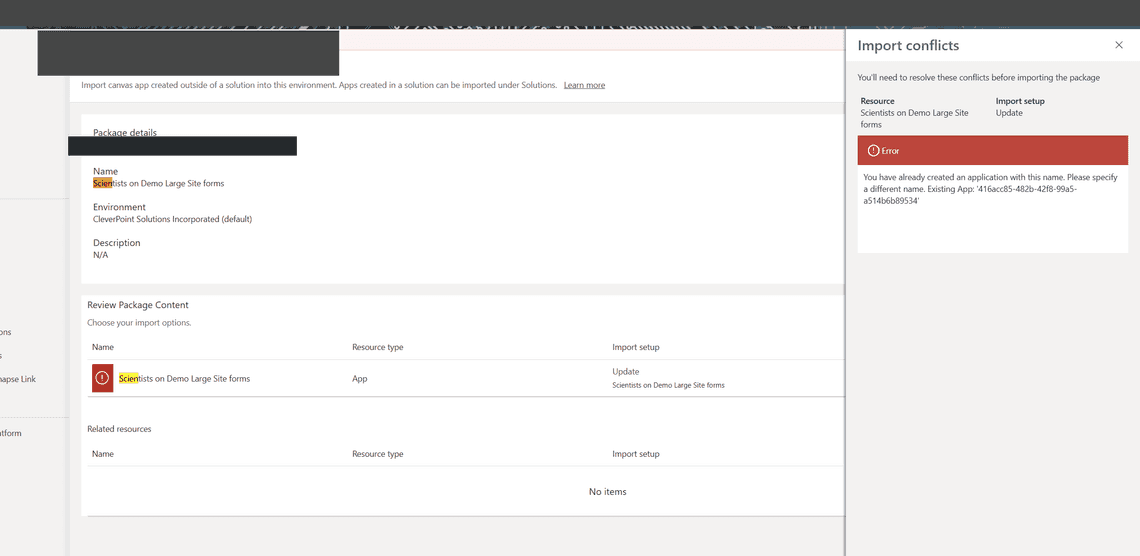
.zip with “Create as new”, keep the same nameGo to make.powerapps.com → Apps → Import canvas app, upload the .zip, and in the conflict-resolution panel:
Click Import. The binding from the SharePoint list to the form is resolved by name, so keeping the name preserves the list binding. A few seconds later the form is live in the list’s New/Edit/Display panes with your edits applied.
Import Package → Update: customized forms are excluded from the target dropdown by design. You can see this directly: the form is missing from the list even though it clearly exists in the environment.

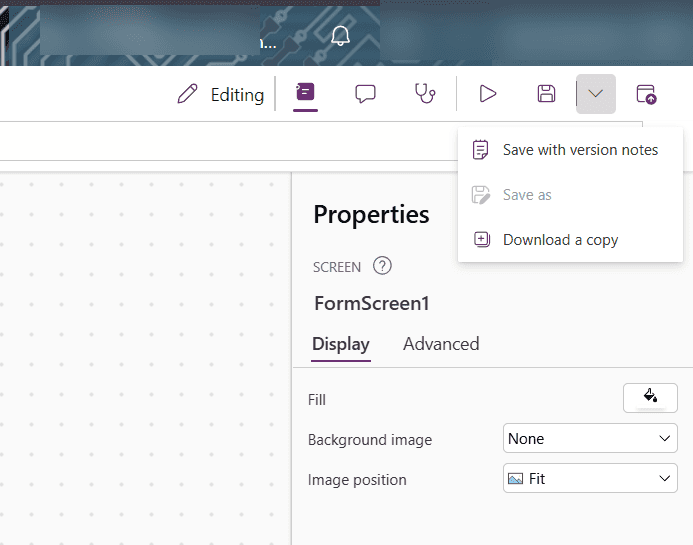
Power Apps Studio → File → Open / Load from file: removed from the new Studio UI. The top-right “Editing” dropdown only offers Save with version notes / Save as (greyed) / Download a copy.
pac canvas CLI: subcommands are download / list / pack / unpack / validate / create only. There is no upload, update, or replace verb.
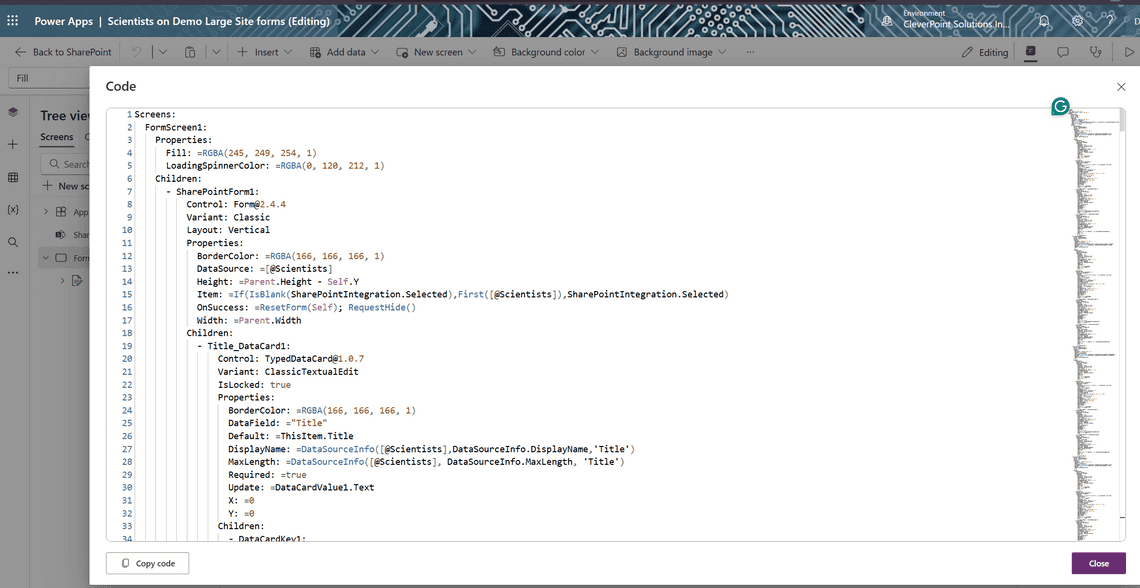
Studio’s built-in “Code” view: you can open it and see the exact YAML the app is made of, which looks promising for about three seconds. Then you realize the only button at the bottom is Copy code. There is no “Apply” or “Save”. The Code view is strictly read-only, so you cannot use it to edit a form in place.
Canvas-authoring MCP server (sync_canvas): strips the SharePointIntegration control from the form during sync, which produces 6 “SharePointIntegration isn’t recognized” errors in Studio and renders the form inert. Do not point this MCP at a customized list form.

“Create as new” without deleting first: blocks with a name collision the moment you try to keep the original name.
Round-tripping the YAML is what unlocks AI-assisted form development. Once the files are on disk, Copilot and Claude Code can rename controls en masse, substitute patterns across every card, copy control trees between forms, rewrite Power Fx formulas to a new convention, or flip Required flags based on a spec, all in one pass. None of that is practical in Studio. For small tweaks Studio is still faster, but for any real refactor the AI-on-YAML loop is the win, and this round-trip is the only way to land those edits back on the live list without losing the binding.
