





Microsoft 365 Copilot - Lessons Learned
December 04, 2024
4 min
Once makers start building agents in Agent Builder, the requests start piling up. Every agent that a maker submits to the org catalog waits in the Microsoft 365 admin center until an admin approves or rejects it. And every time a maker changes a published agent, for example by adding a new document, the change comes back as a new request.
In most organizations only the Global Administrators can approve these requests, so every agent change waits for one person. You don’t need to work that way. Microsoft has a dedicated role for this job.
The recommended role is AI Administrator. It is the least-privileged role that can review, publish and reject agent requests, and it gives no access to the rest of the tenant.
| Role | What it can do with agents |
|---|---|
| AI Administrator | Review, publish and reject agent requests, choose who can install an agent, manage agent settings. This is the recommended role. |
| AI Reader | View agents and requests. Cannot approve or reject. |
| Global Reader | View only. Cannot approve or reject. |
| Global Administrator | Everything. Far more than this job needs. |
AI Administrator does not cover everything around agents. It cannot configure Conditional Access policies or Entra access packages. If you also manage Teams app setup and permission policies, that still needs Teams Administrator. None of that is needed to approve or reject an agent.
Only a Global Administrator or a Privileged Role Administrator can assign the role.
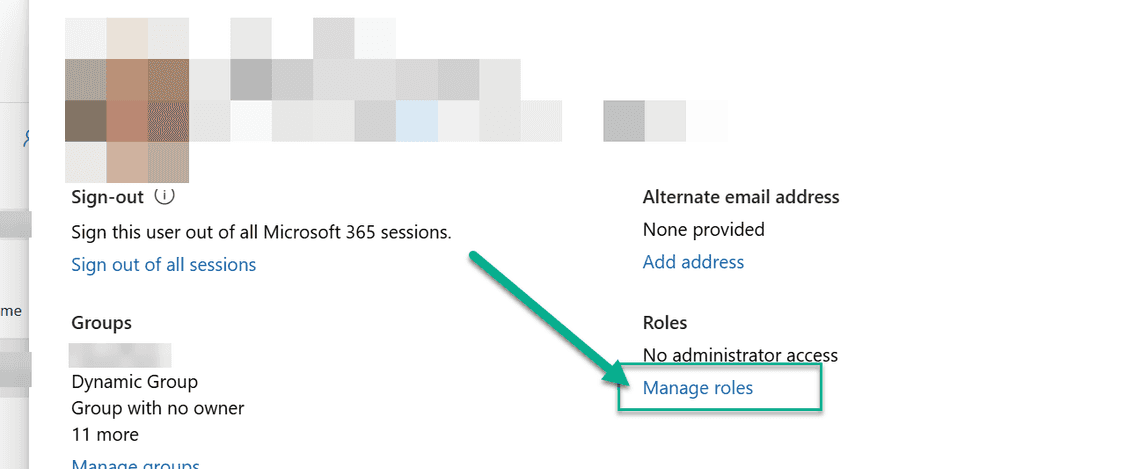
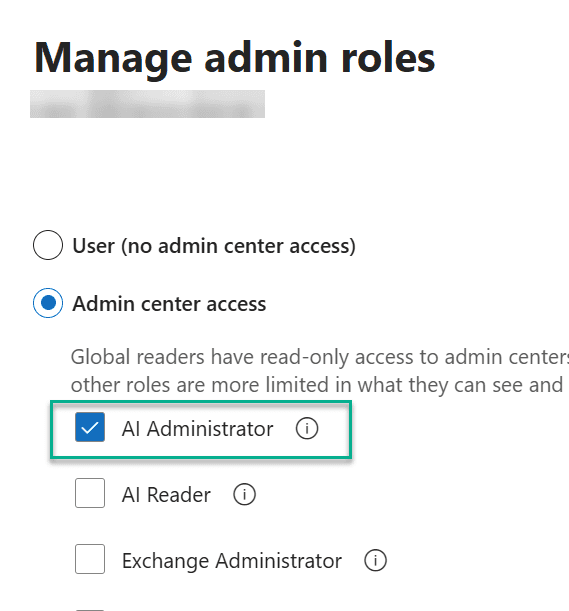
You can do the same in the Entra admin center under Roles & admins > AI Administrator > Add assignments. If your tenant has Entra ID P2, make the assignment Eligible through Privileged Identity Management rather than permanent. A role that gets used a few times a month is a good candidate for just-in-time activation. If you need a quick way to the PIM page, I wrote about it in How to Get to Privileged Identity Management (PIM) Page Quickly.
The role usually takes effect within a few minutes. Sign out and back in before you test it.
There are two ways to get to the requests.
The quick way is Agents > Overview. The Pending requests for agents card shows how many requests are waiting. Click Manage requests.
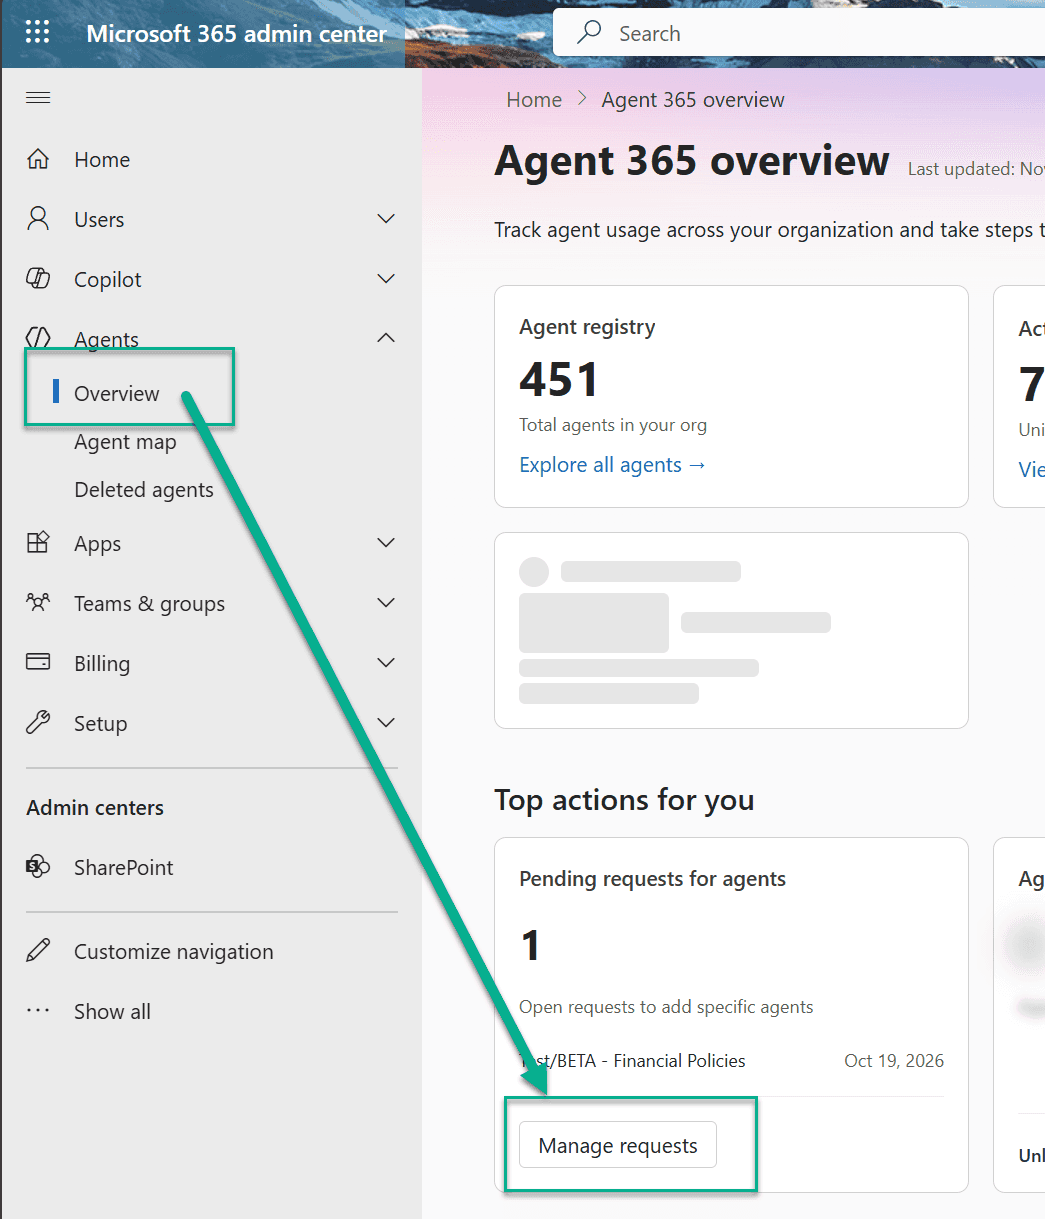
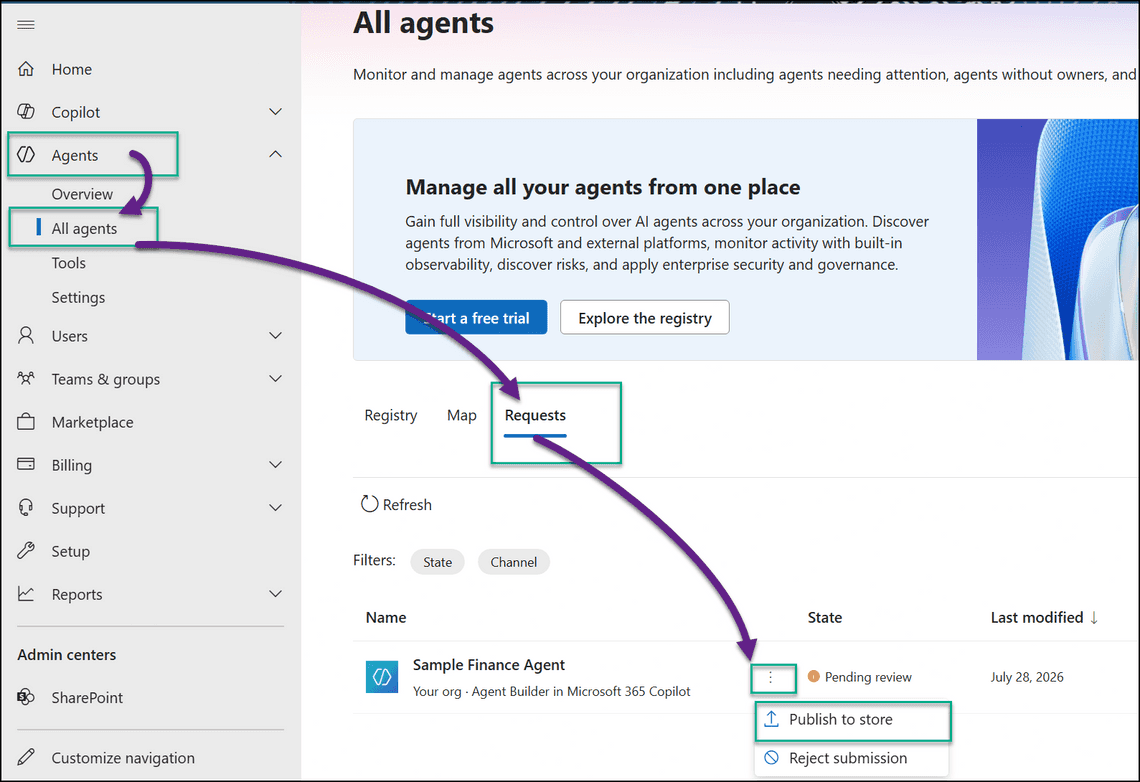
The longer way is Agents > All agents > Requests. Both take you to the same list.
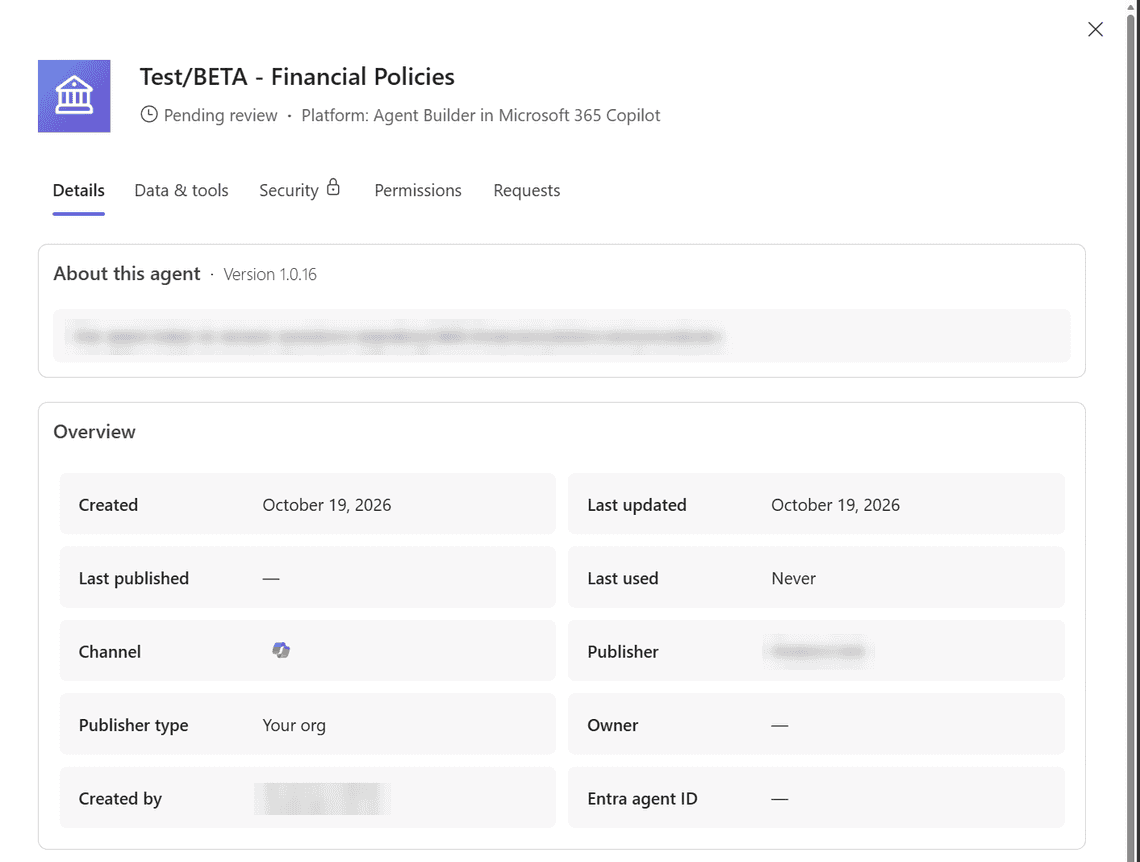
This is the step that matters. Approving an agent is easy. Reviewing what you are approving is the real job of the AI Administrator. Click the agent name, not the ⋮ menu, to open its details pane.
The Details tab shows the version number, when it was created and who created it. Last published stays empty until the version has actually been published. That tells you whether you are looking at a new submission or at what users already have.
The Data & tools tab is the most important one. It shows what the agent can read and which documents it uses for knowledge.
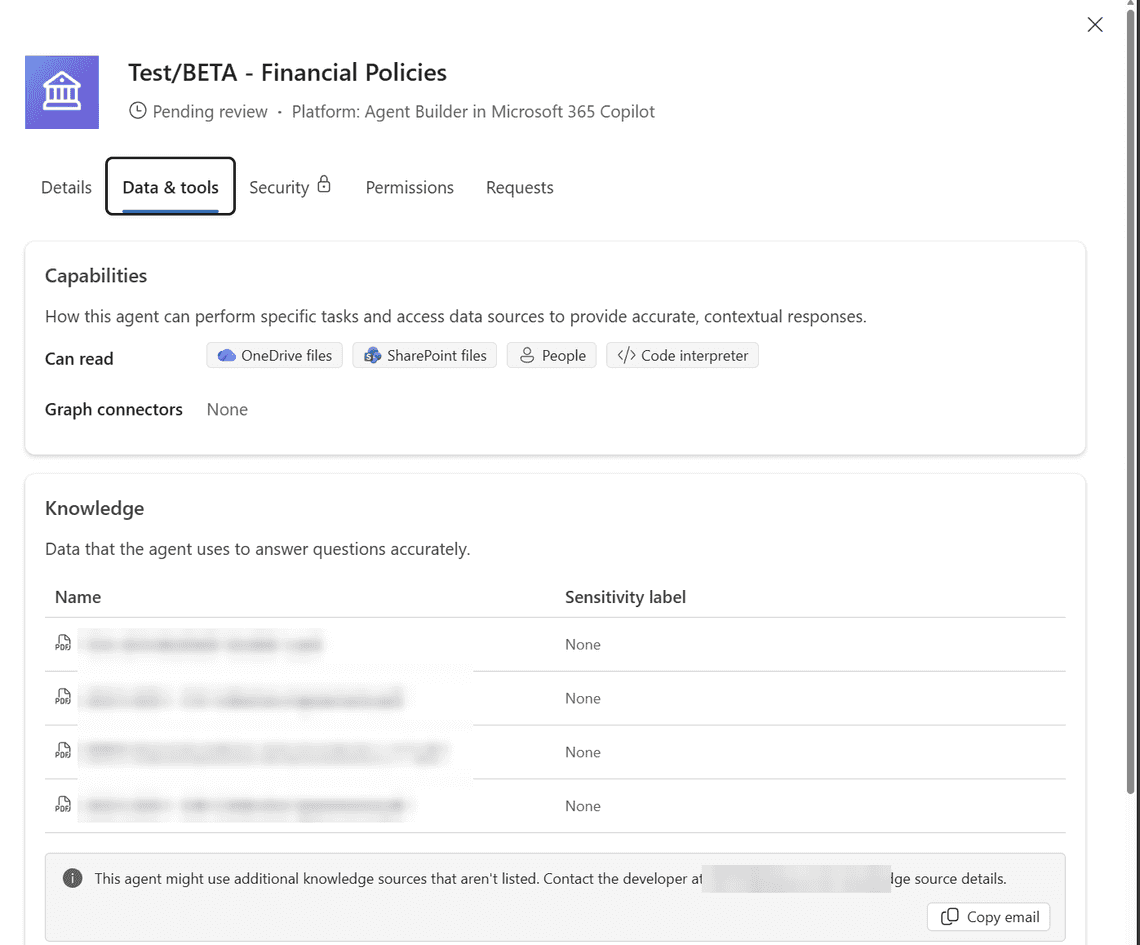
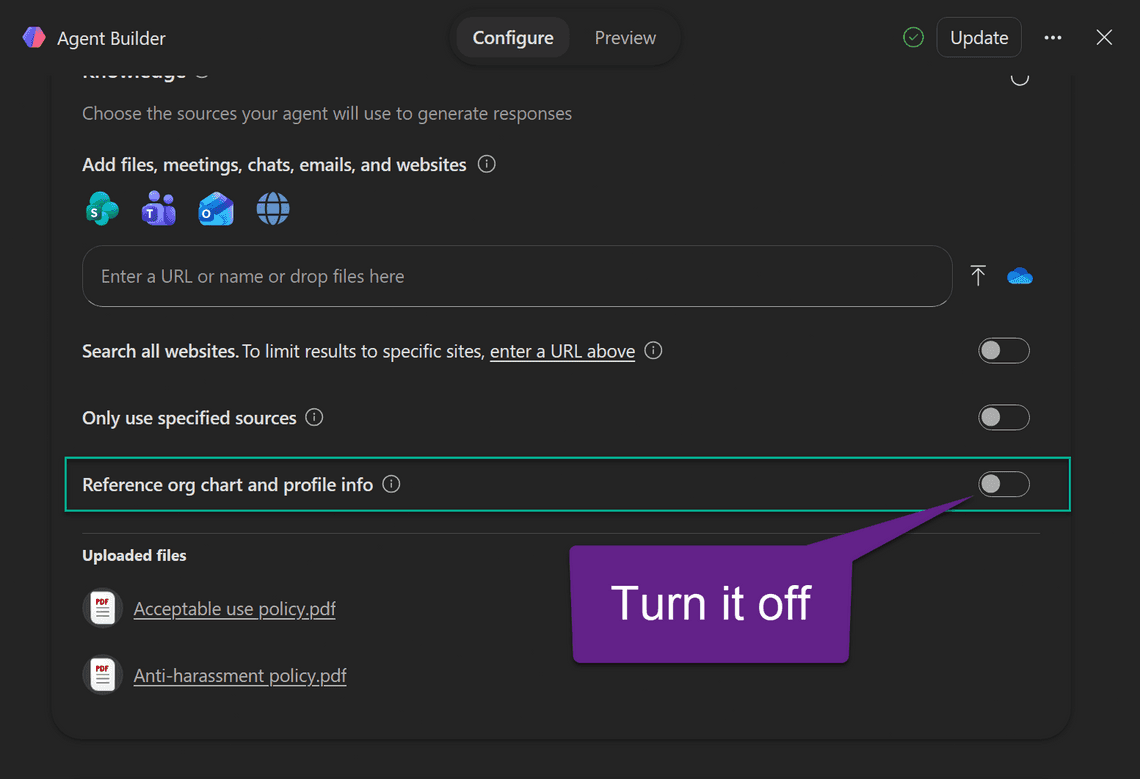
Pay attention to People in the Can read list. It means the maker left Reference org chart and profile info switched on in Agent Builder. The toggle is on by default for every maker who holds a Microsoft 365 Copilot license, so most makers never chose it.
That one capability decides who can use the agent. With People enabled, the agent requires a full Microsoft 365 Copilot license, and pay-as-you-go Copilot Credits cannot cover it. Anyone without the license sees the agent in the store, but the Add button is greyed out and the banner reads:
To use this app, you’ll need a Microsoft 365 Copilot license.
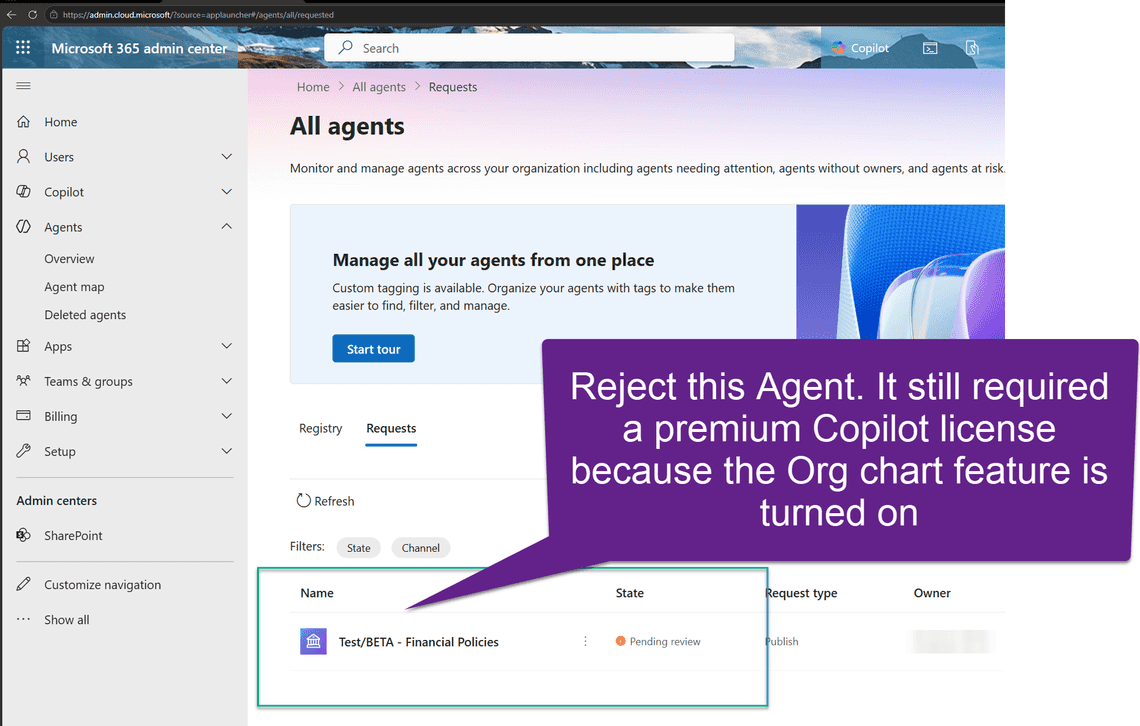
In an organization where only a small share of staff hold Copilot licenses, an agent published with People enabled is unusable for almost everyone. Unless the agent really needs the org chart, reject the request and ask the maker to switch it off.
While you are on this tab, check two more things:
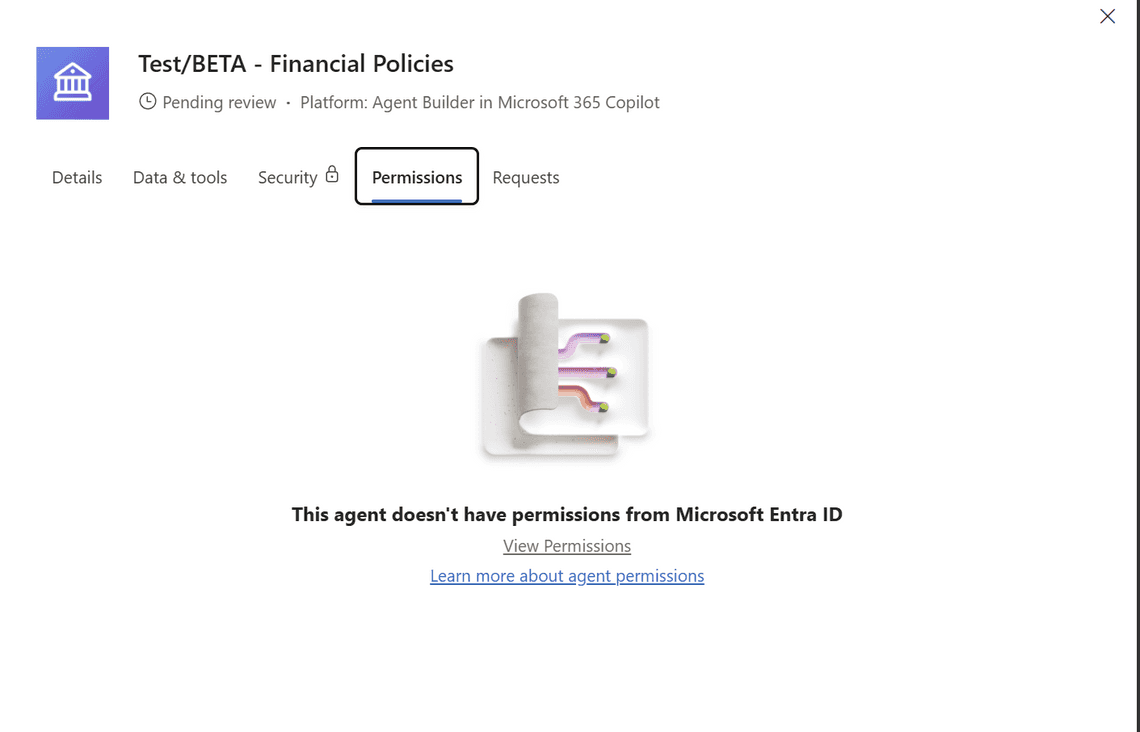
The Permissions tab shows whether the agent holds any Microsoft Entra ID permissions. An Agent Builder agent without tools usually has none.
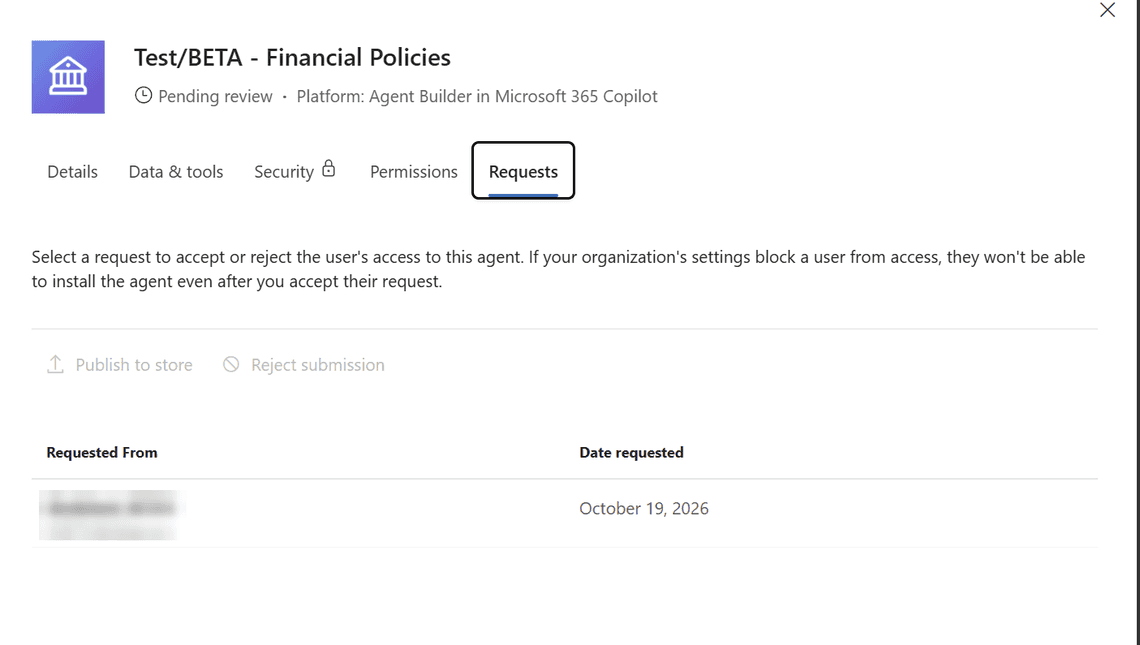
The Requests tab shows who submitted the agent and when. The Publish to store and Reject submission buttons stay greyed out until you select the request row.
If the review turns up a problem, reject the submission rather than leaving it in the queue. Open the ⋮ menu next to the agent and choose Reject submission.
The maker opens the agent in Agent Builder at m365.cloud.microsoft, goes to the Configure tab and scrolls down to the Knowledge section.
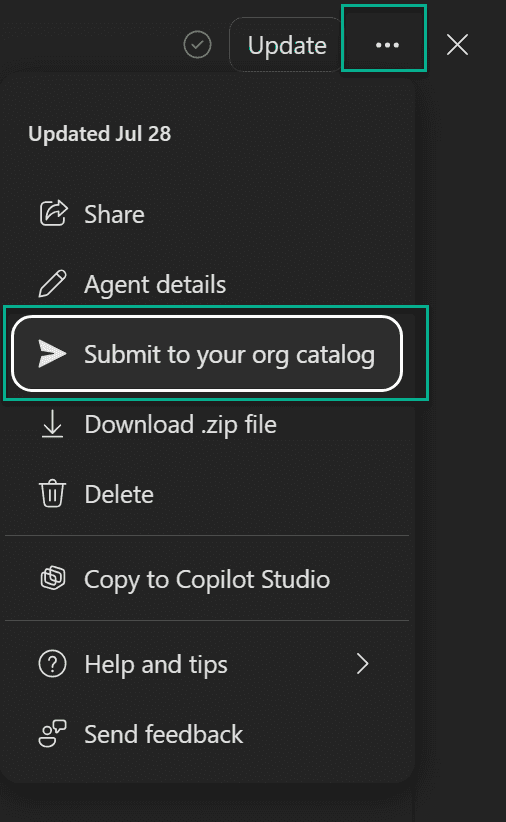
Then the maker opens the … menu and chooses Submit to your org catalog. This creates a new request for the admin.
Two things often confuse makers.
Clicking Update saves the agent for the maker but does not change the published version. Users keep getting the last approved version until an admin publishes the new one.
Every content change goes through the same approval. If the agent’s knowledge points at a SharePoint library instead of uploaded files, new and revised documents are picked up automatically without a new request. For agents built on documents that change regularly, this saves a lot of round trips.
Once the corrected request arrives and the review is clean, go to Agents > All agents > Requests, open the ⋮ menu next to the agent and choose Publish to store.
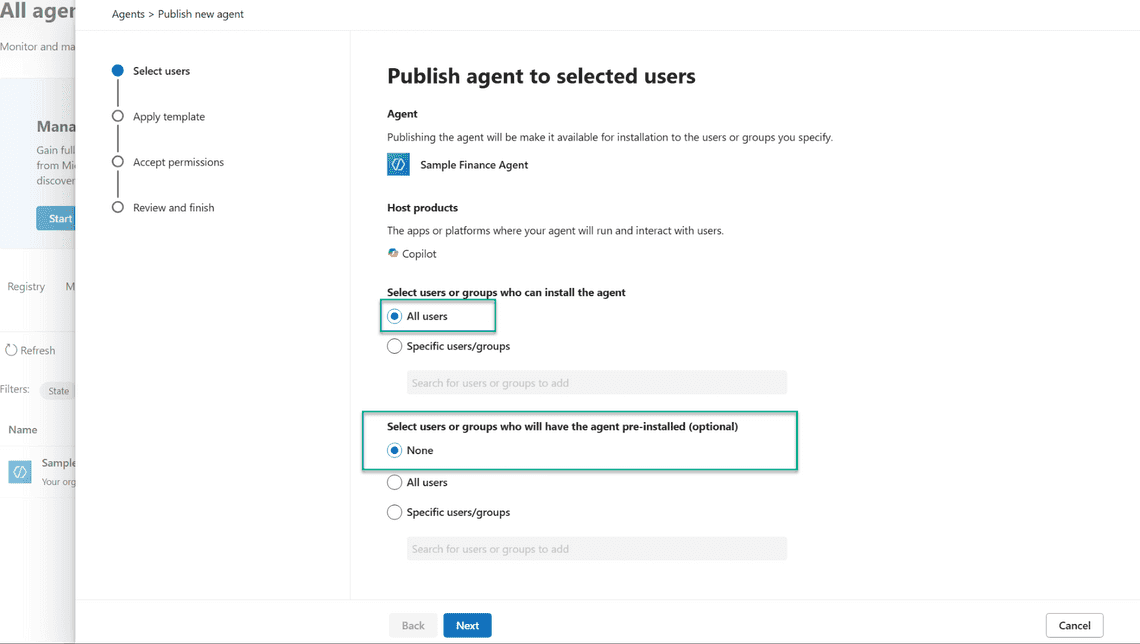
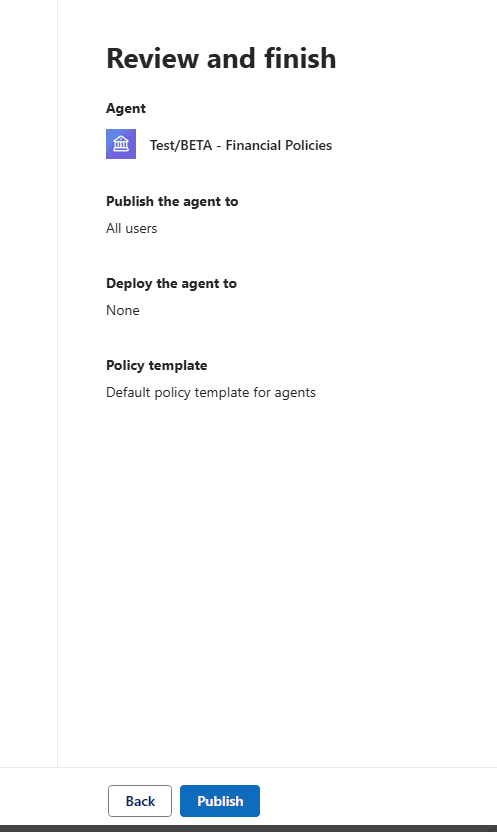
The wizard asks two questions.
The first is who can install the agent. Choose All users, or Specific users/groups to limit the agent to a security group during a pilot. The second is who gets it pre-installed. Leave it at None unless you want the agent to appear for people without them adding it.
Leave the policy template at the default, accept the permissions, review the summary and click Publish.
Allow up to 24 hours before testing. Test with two accounts, one with a Copilot license and one without, and ask a question that only the newly added documents can answer. This confirms both that the new version is live and that unlicensed users can use it. If the unlicensed account can add the agent but gets no answers from the documents, pay-as-you-go Copilot Credits still need to be enabled on the tenant.
While testing agents I came across three different error messages. The wording tells you the cause.
| Message | Cause |
|---|---|
| To use this app, you’ll need a Microsoft 365 Copilot license. | The agent uses a capability that requires a Copilot license, usually People (the org chart). |
| You don’t have permissions to add this agent. Please contact your IT admin for help. | An admin policy prevents this user from installing agents. |
| Your organization has prevented this agent from being installed. | Usually an access scope problem. A typical case is an agent shared by link that was never shared with this user. |
Give the people who look after your agents the AI Administrator role instead of Global Administrator. They can approve, reject and publish agents without broad access to the tenant. Make the review a habit too. A quick look at the Data & tools tab before you click Publish catches the org chart toggle, which otherwise blocks the agent for everyone without a Copilot license.

