


PnP.PowerShell App Registration

Table Of Contents
Hi there, SharePoint enthusiasts! I want to share the manual on how to correctly configure the PnP.PowerShell app in Entra ID.
Prerequisites
- Global Administrator access to your Microsoft 365 tenant
- Windows 10/11 operating system
Installation Steps
Step 1: Install PowerShell 7
PowerShell 7 is required for compatibility with the latest PnP.PowerShell module. If PowerShell 7 is not installed, you can install it using the Windows Package Manager (winget):
💡 Note: After installation, close any existing PowerShell windows and launch PowerShell 7 from the Start menu.
Step 2: Install PnP.PowerShell Module
Launch PowerShell 7 and run:
When prompted:
- Select [Y] Yes to install from PSGallery
- Wait for the installation to complete
Step 3: Register the Azure App
Create a new Azure App registration with the following command:
💡 Important: Replace
yourtenant.onmicrosoft.comwith your actual tenant domain.
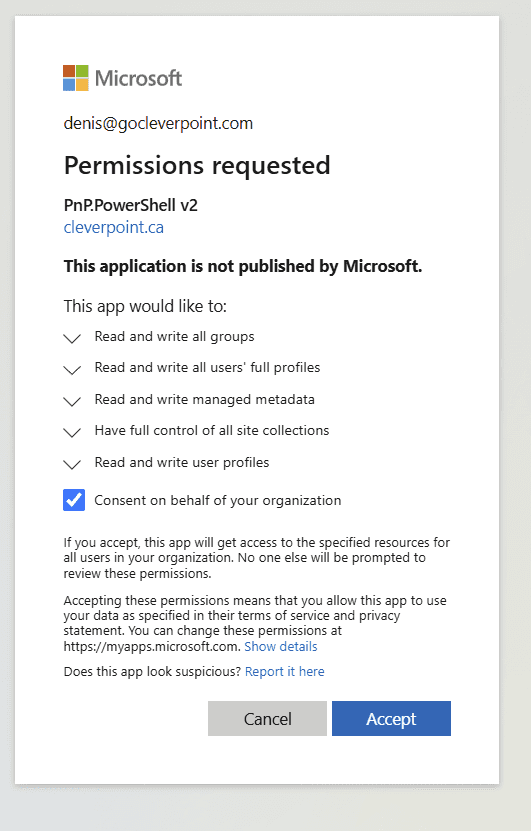
Step 4: Authentication and Consent
- A browser window will open automatically
- Sign in with your Global Administrator account
- Review the requested permissions
- Click Accept to grant consent for your organization
Permissions Granted
The app registration will request the following permissions:
- User.Read - Sign in and read user profile
- Sites.FullControl.All - Full control of all site collections
- Group.ReadWrite.All - Read and write all groups
- TermStore.ReadWrite.All - Read and write term store data
Step 5: Document the Application ID
After successful registration, PowerShell will display your Application (Client) ID:
Azure App ID: XXXXXXXX-XXXX-XXXX-XXXX-XXXXXXXXXXXX
Important: Save this ID in a secure location. You’ll need it for all future connections.
Step 6: Test the Connection
Verify your setup by connecting to SharePoint Online:
Replace:
XXXXXXXX-XXXX-XXXX-XXXX-XXXXXXXXXXXXwith your actual Azure App IDyourtenantwith your tenant name
Bonus: Grant Sites.Selected permission to the specific app for a specific SharePoint Site
Share
Previous Article
SharePoint News Webpart Dimensions for DesignersRelated Posts


Troubleshooting SharePoint "Sorry, You Don't Have Access"
March 26, 2026
12 min

Broken OneNote Notebook Shows as Folders after Migration to SharePoint Online
February 25, 2026
1 min

Free SharePoint Backup. Getting Started with Veeam for Microsoft 365
December 23, 2025
3 min

SharePoint News Webpart Dimensions for Designers
August 05, 2025
2 min