


Get History of Server Reboots
December 17, 2025
1 min
Azure Automation is a cloud-based automation and configuration service that allows you to automate tasks. It provides a way to run PowerShell scripts in the cloud without managing the underlying infrastructure. This article will explore how to run PnP PowerShell scripts from Azure Automation.
PnP PowerShell is a powerful set of cmdlets that allows you to interact with SharePoint. By hosting your PnP PowerShell in Azure Automation, you can automate various SharePoint tasks, such as provisioning sites, managing lists and libraries, and generating periodic reports. You can run PowerShell scripts on a schedule or trigger them based on events.
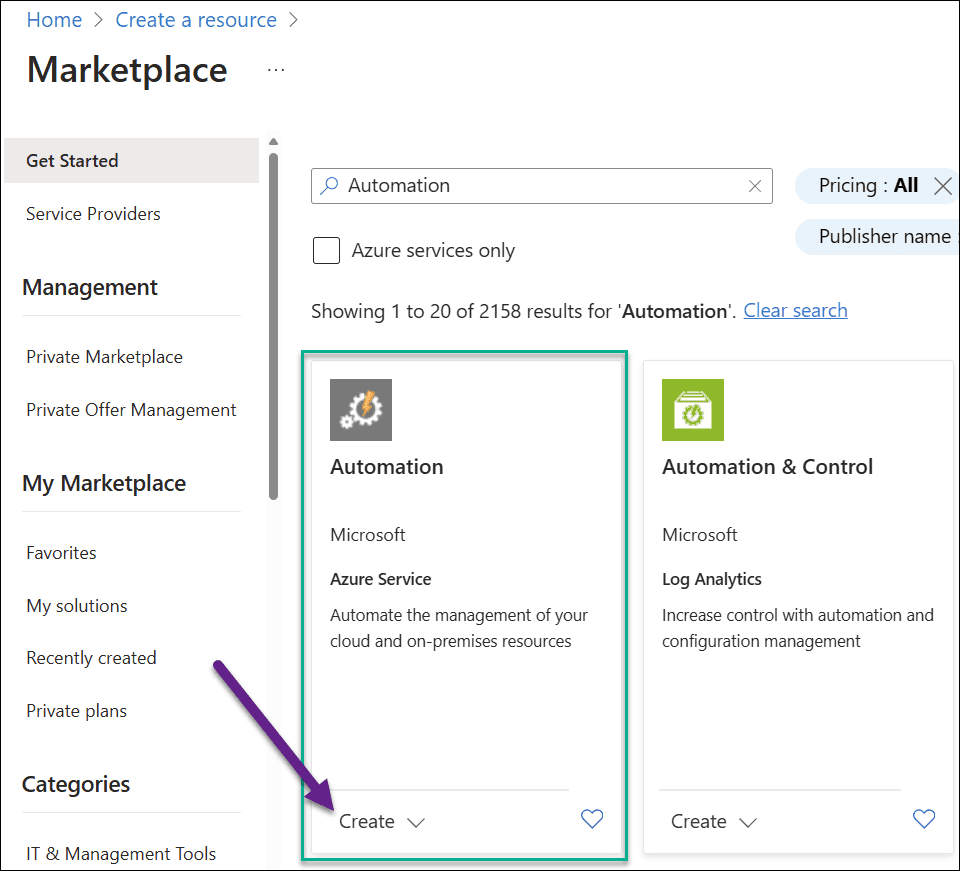
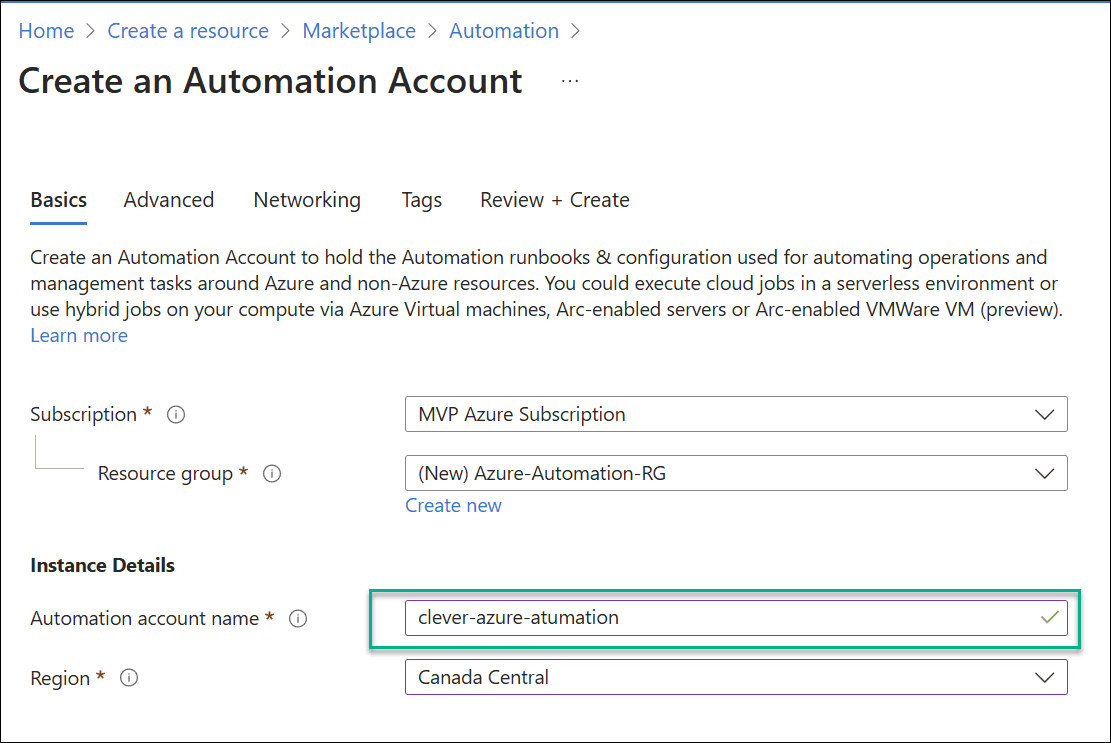
First, you need to create an Azure Automation account. You can do this by following these steps:

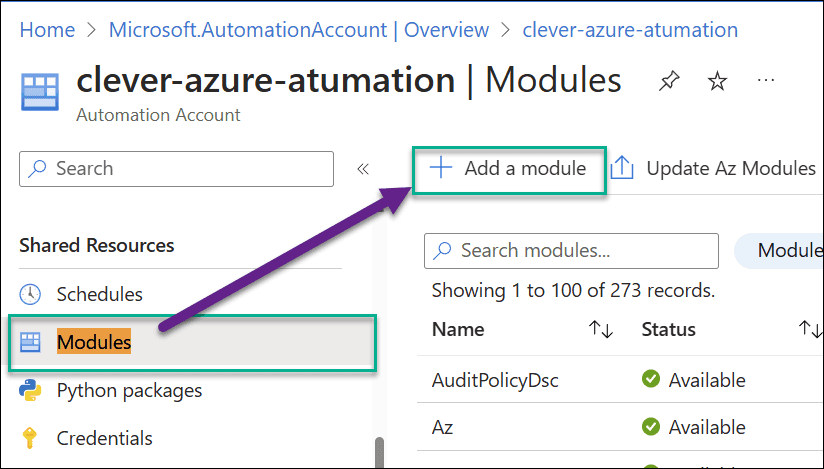
To import PnP.PowerShell module:
Click on “Modules” under “Shared Resources” in the Azure Automation account.
Click on “Add a module”.
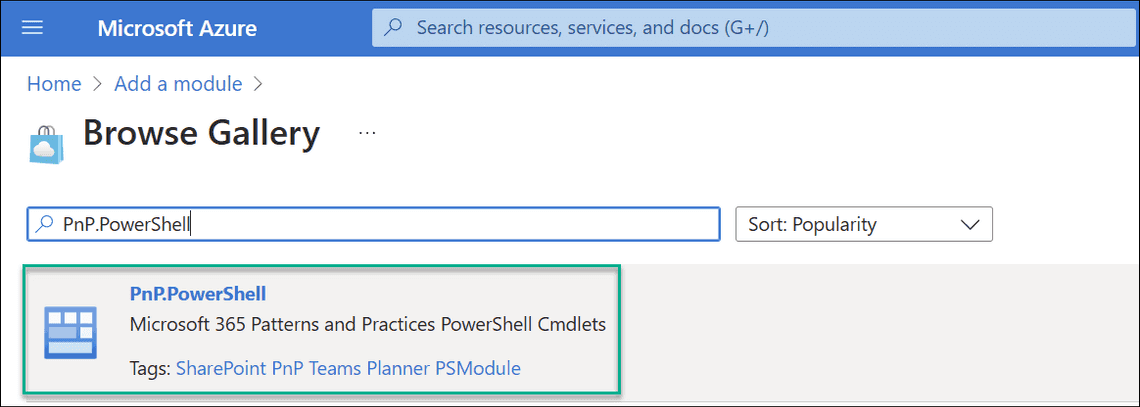
Browse from gallery > Click here to browse from gallery
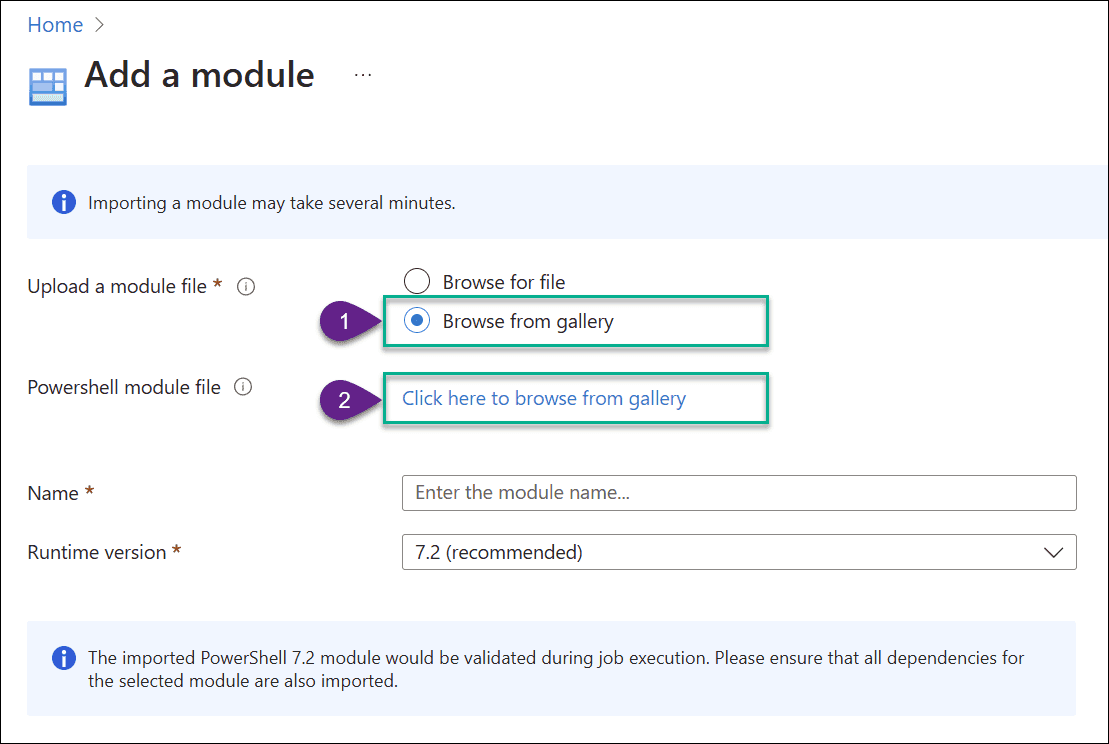
Click on PnP.PowerShell > Select
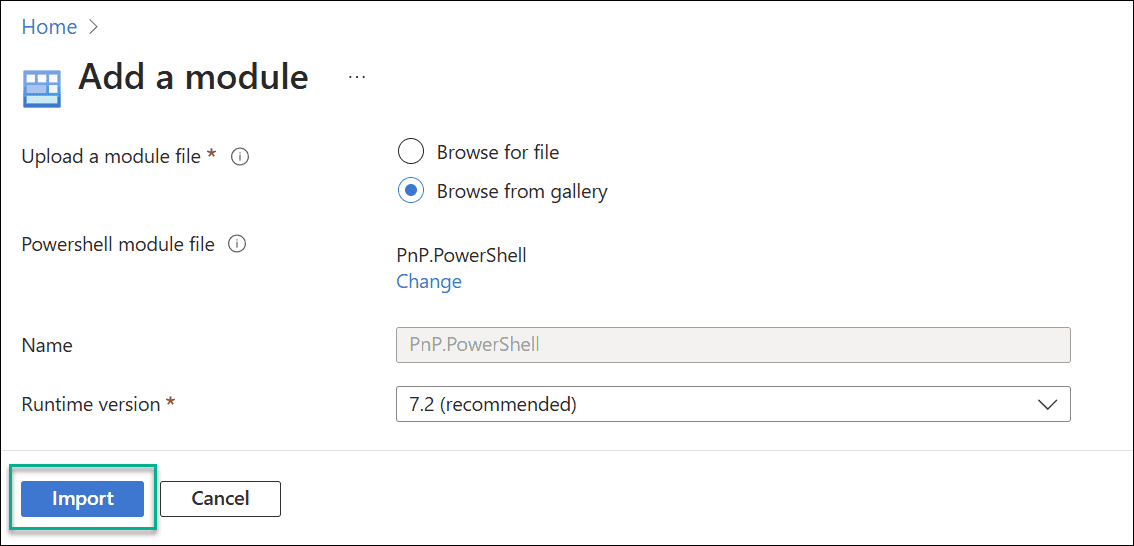
Click on “Import” and wait for a few minutes until the module is imported.
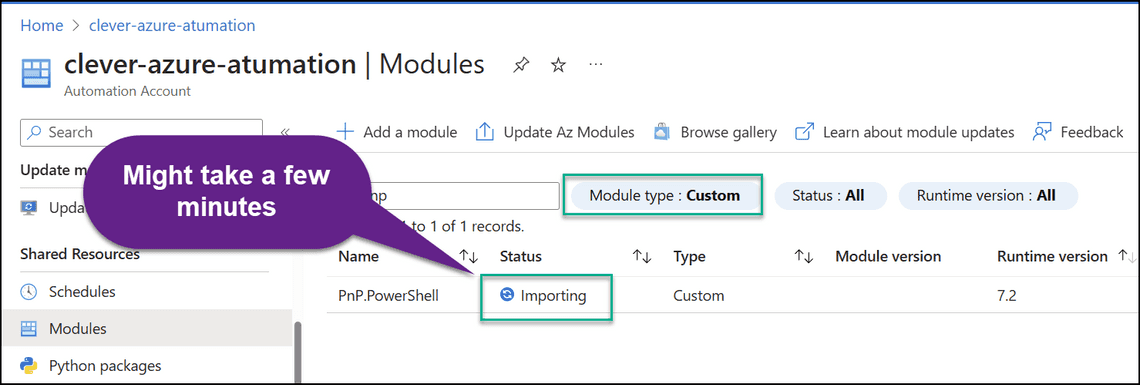
You can monitor the import progress by checking the Status column:
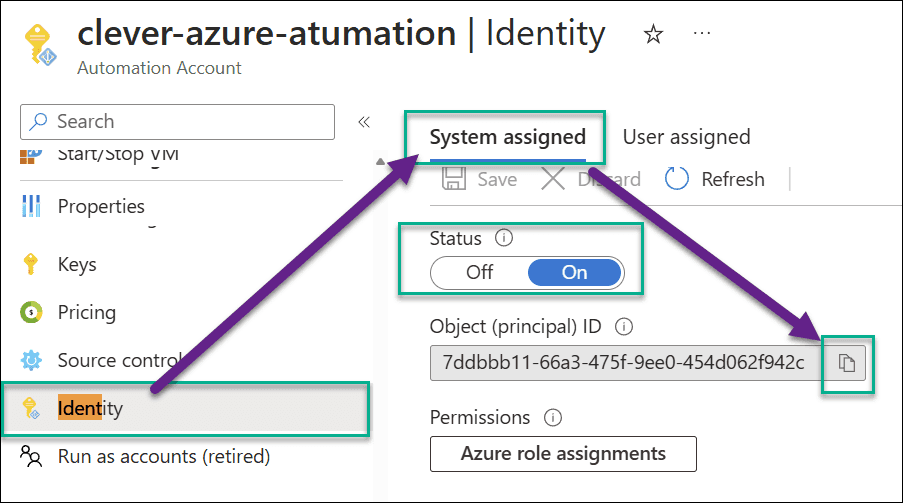
Managed Identity is a feature of Azure that allows you to authenticate to services without storing credentials in your code. It has several advantages over other authentication methods, such as not needing to manage service principals or certificates. To configure Managed Identity for your Automation account:
To assign permissions to the managed identity, we might need to install the PnP.PowerShell module locally. This will allow us to run the Add-PnPAzureADServicePrincipalAppRole cmdlet to assign permissions to the Managed Identity.
To install the PnP.PowerShell module locally
To assign SharePoint permissions to the Managed identity used by the Automation account, run the follow command.
💡Use the Principal ID captured from the earlier step:

💡 You might need to assign different permissions, based on your case.
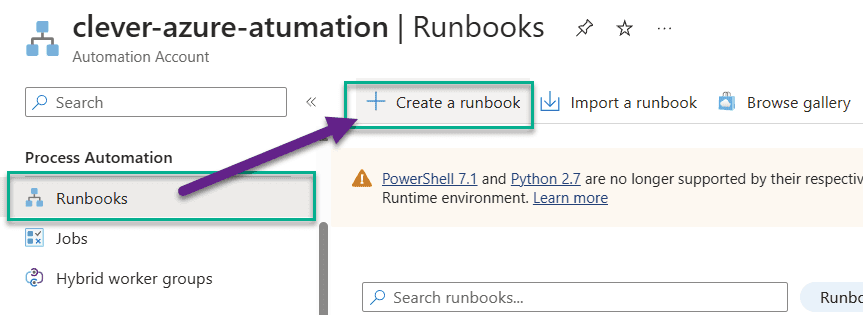
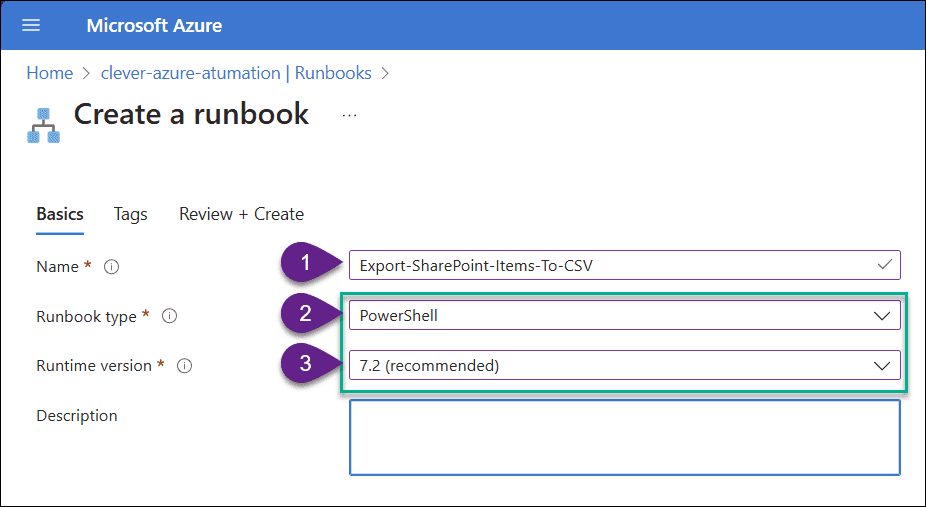
Now, let’s create our first runbook. A runbook is a set of tasks that you want to automate. In this case, we will create a runbook that runs a PnP PowerShell script to authenticate using the Managed Identity.
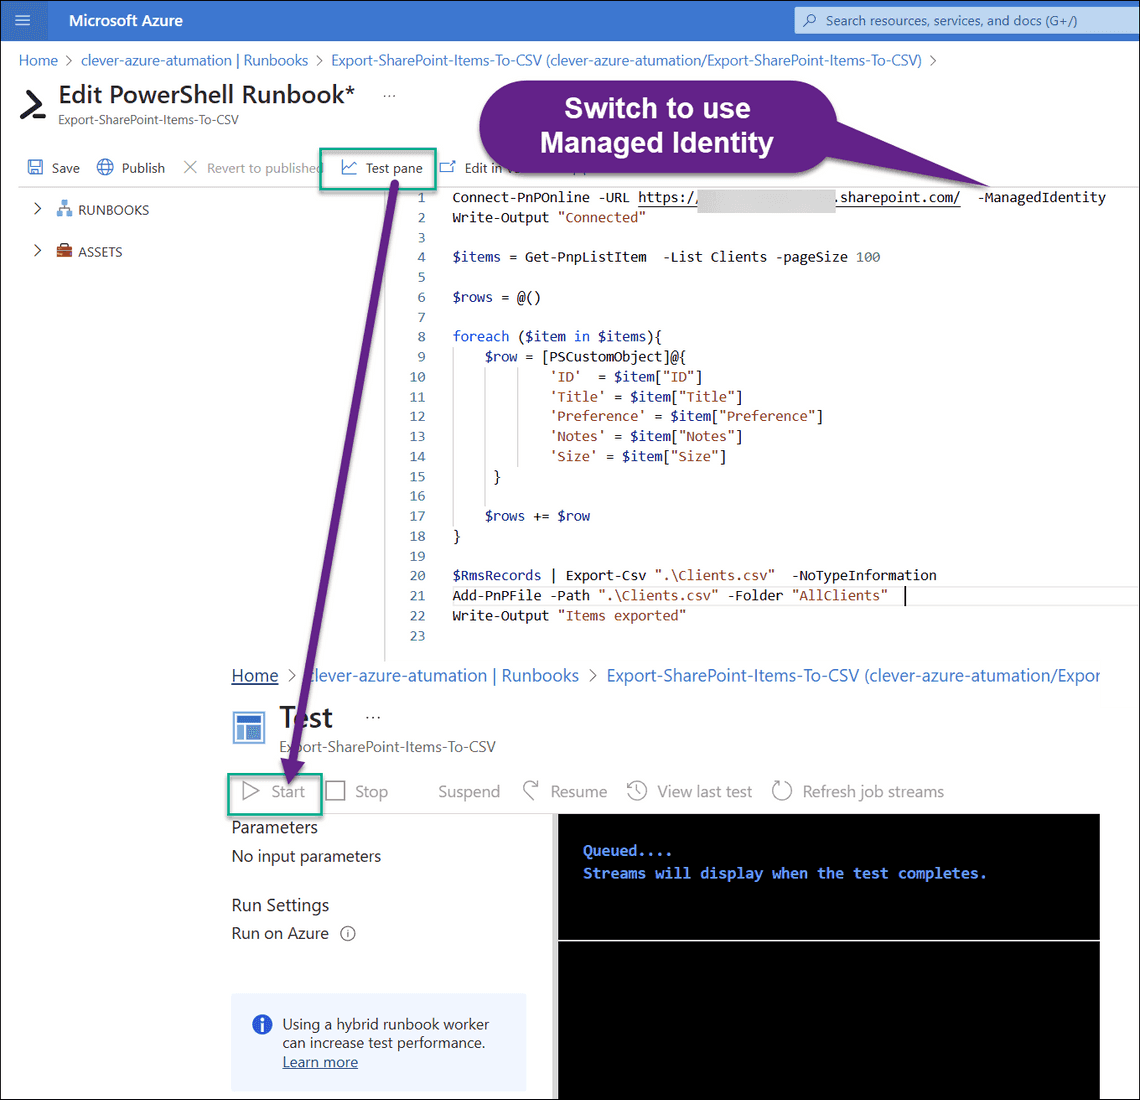
💡 Notice that we are using the ManagedIdentity parameter to authenticate to SharePoint. This will use the Managed Identity we configured earlier to authenticate to SharePoint.
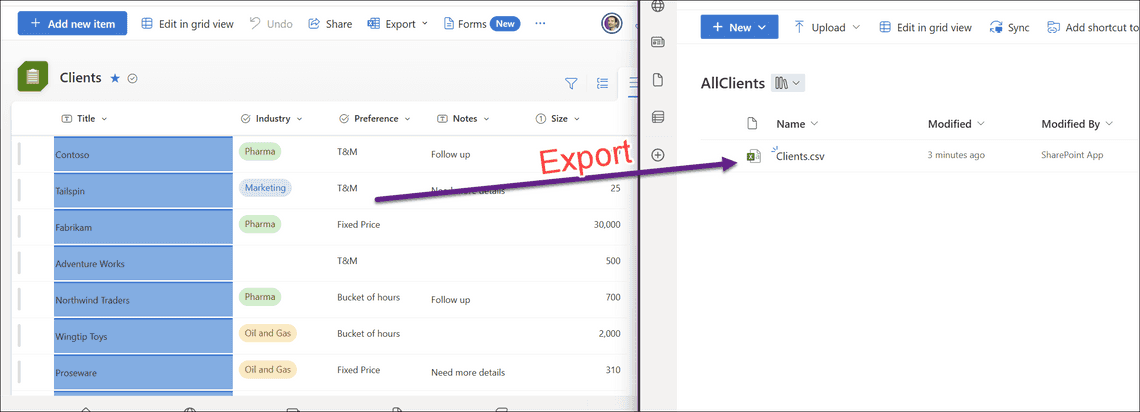
In my case, I will use a script that will get a list of all items from a SharePoint list and export them to a CSV file. It will then upload the CSV file to a “AllClients” document library in SharePoint:
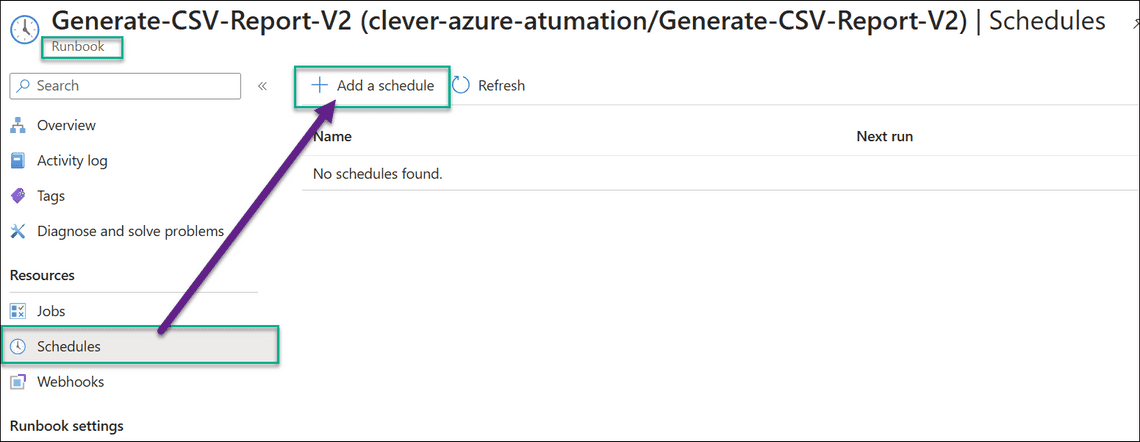
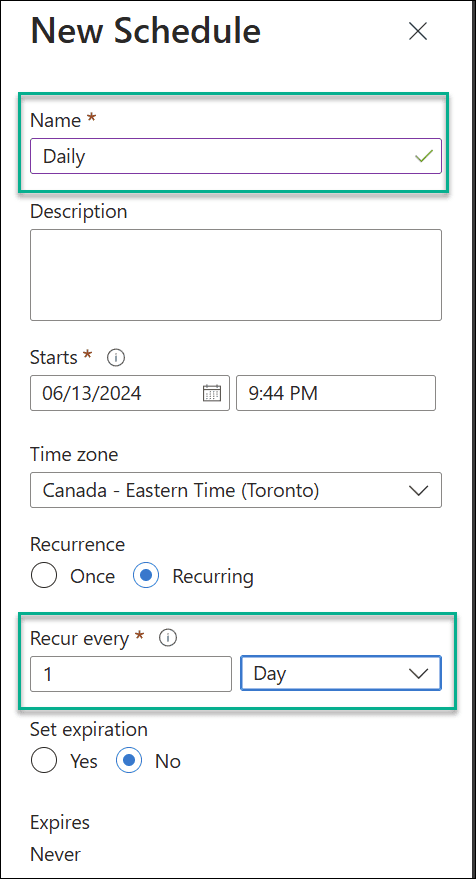
You can schedule the runbook to run at specific times or intervals. To schedule the runbook:
Azure Automation is a pay-as-you-go service, and you are charged based on the number of runbooks executed and the amount of resources consumed. You can check the pricing details on the Azure Automation pricing page. In most cases, the cost of running PnP PowerShell scripts in Azure Automation is minimal, and you can get started with a free tier.
By combining the power of PnP PowerShell with Azure Automation, you can automate various SharePoint tasks and streamline your SharePoint administration.
This can help you save time and reduce manual effort, allowing you to focus on more important tasks. If you haven’t already, try Azure Automation and see how it can help you automate your workflows.


